Tallow has made a comeback — and for good reason. This homemade tallow face cream is my go-to for deeply nourishing, natural skincare. Today, I’m sharing my exact tallow face cream recipe, how to customize it for your skin type, and my favorite Amazon finds that make this DIY a total breeze.
This post contains affiliate links. I may earn a small commission if you shop through them — at no extra cost to you! I only share products I personally use and love.
Why Make a Homemade Tallow Face Cream?
Tallow from grass-fed beef fat is packed with vitamins A, D, E, and K and healthy fats like stearic and oleic acid. These nutrients closely mimic our skin’s natural oils, making tallow a powerhouse for:
- Deep hydration
- Improved elasticity
- Skin barrier support
- Smoothing and softening
It’s no wonder our grandmothers loved it — because it works.
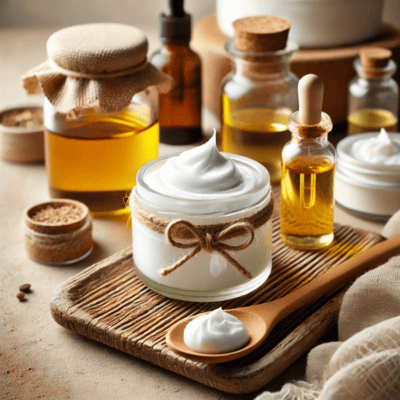
My Favorite Tallow Face Cream Recipe
Ingredients:
- 1/2 cup grass-fed tallow (Shop the tallow I love on Amazon)
- 1 tablespoon jojoba oil (Find it on Amazon)
- 1 tablespoon castor oil (Available on Amazon)
- 1 tablespoon vitamin E oil (My go-to on Amazon)
- 30 drops Frankincense essential oil (This one is amazing!)
- 20 drops Copaiba essential oil (Get it here)
- 15 drops Clove essential oil (Shop now)
Instructions:
- Melt the tallow in a double boiler over low heat.
- Let cool slightly.
- Stir in jojoba, castor, and vitamin E oils.
- Add essential oils and mix well.
- Pour into a glass jar and allow to solidify at room temperature.
How to Use It
Scoop a tiny amount and apply to clean, dry skin. It melts into your face and a little goes a long way. Use it morning or night — or both, especially if your skin is dry or sensitive.
✨ Shop the Ingredients I Use
- 🛒 Grass-Fed Tallow
- 🛒 Jojoba Oil
- 🛒 Castor Oil
- 🛒 Vitamin E Oil
- 🛒 Frankincense Essential Oil
- 🛒 Copaiba Essential Oil
- 🛒 Clove Essential Oil
Customize It For Your Skin Type
Want to tweak this recipe? Here’s how to make it your own:
For Dry Skin:
- Replace jojoba oil with sweet almond oil for its deeply hydrating properties.
- Add lavender essential oil for its calming and moisturizing effects.
Acne-Prone Skin:
- Swap castor oil for grapeseed oil, which is lightweight and non-comedogenic.
- Include tea tree essential oil for its antibacterial and anti-inflammatory benefits.
For Anti-Aging:
- Add rosehip seed oil to boost collagen and reduce fine lines.
- Include geranium essential oil, known for improving skin elasticity.
Sensitive Skin:
- Use calendula oil for its soothing and anti-inflammatory properties.
- Replace clove oil with chamomile essential oil to calm irritation.
Simple swaps = better results for your skin.
Why I Make My Own Skincare
After years of trying “natural” products full of mystery ingredients (and hefty price tags), I started creating my own. Once I learned how easy it was to use real, effective ingredients — I was hooked. Fewer breakouts, no irritation, and total control over what goes on my skin.
Bonus? I save money, and I feel good about every ingredient.
Storage Tips
Store your cream in a cool, dry spot. It’ll last for months thanks to the stability of tallow and vitamin E.
Have you made your own face cream before? Planning to try this one? Let me know how it goes — and how you customize it! You can also check out my trending DIY Whipped Magnesium Lotion recipe here.
Check out My Favorite High-End Wellness Picks

XO Marla Kay
- Summer Scent Recipes for a Non-Toxic Home: My Favorite Diffuser Blends & Simmer Pots
- Best Herbal Tinctures to Buy (And When I Don’t DIY)
- How to Make Rose Water at Home – My Favorite Recipe + a Teen-Friendly Option
- DIY Non-Toxic Sunscreen That Works (Even on My Ginger!)
- Non-Toxic Summer Must-Haves: Clean Picks for Skin, Home & Wellness